Marposs 3D Shape Inspector (3DSI) is measurement software for PCs with Windows operating systems. It allows both mold makers and mass production machine shops, to turn their own machining center or milling/boring machine into a virtual CMM. This enables in-process measurement and verification of the accuracy of the machined shape without removing it from the machine.
3DSI makes it possible to check sculptured surfaces, one-dimensional, two-dimensional and tri-dimensional geometrical elements, as well as geometrical tolerances such as concentricity, parallelism, angularity, etc., which up to now were the prerogative of CMMs only.
Using the software is very simple and does not need specific competences: even an NC programmer using the CAD model of the part being machined, can rapidly generate an in-process measuring cycle without removing the part from the machine.

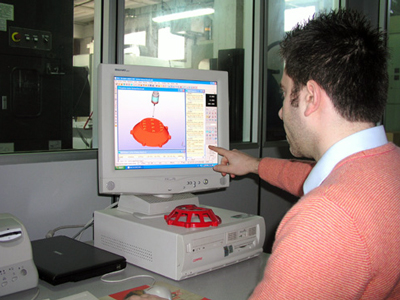
3DSI workstation
3DSI main features
3DSI has the possibility of importing the most commonly used CAD 3D formats.
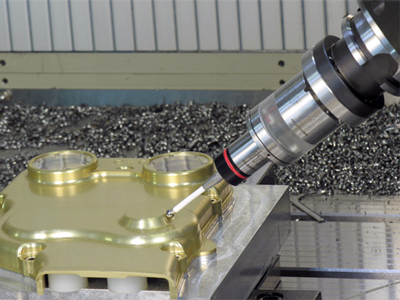
While machining an item, the machine tool equipped with a Marposs probe, can either periodically, or upon the operator's request, carry out the measurement of previously selected points and compare them with the nominal data of the CAD model.
Upon completion of the measuring cycle, 3DSI generates a report that will indicate to the user, either the validity or defectiveness of the machining. In the second case, the operator may decide to intervene, by re-machining the item or simply stopping the work cycle until optimum conditions have been restored. Reports may be customized in text, Excel and HTML format.
Measuring on the machine saves considerable time when compared to the measurement carried out on a CMM, since the part has not to be removed and then re-aligned for reworking. Actually, a CMM represents a bottleneck for the company when used for in-process checks rather than for final testing.


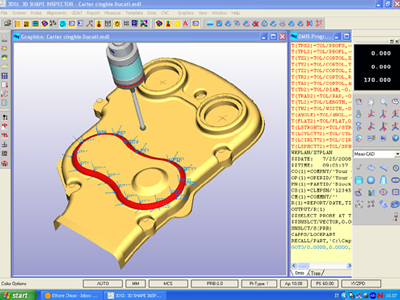
Example of on-machine part-checking and its programming with 3DSI
Advantages with the use of 3DSI
The installation of 3DSI guarantees an immediate process improvement and even extends the feasibility of working high volume production with high accuracy and a reduced number of scrap / rework. Furthermore, the low purchase price of the software ensures a rapid return of investment.
3DSI is user-friendly. Indeed, it is equipped with a very intuitive graphical interface with which the measurement program is quickly created by selecting 2D/3D macros. Before carrying out the measurement on the machine, it is possible to simulate the whole measuring cycle so as to prevent collisions. The software integrates both rapid calibration cycles with automatic search for the calibration sphere position and cycles that can be customized precisely to the customer's needs. Different part alignment cycles are also available, including the best-fitting.
The measurement program generated by 3DSI is converted into the specific language of the customer's NC. Marposs have developed post-processors for the most commonly used numerical controls. Marposs were also the first to introduce the very fast Ethernet connection between the 3DSI station and the NC. At present, this type of transmission is available for Fanuc (FOCAS 1/FOCAS 2) and Siemens (OPC Server), numerical controls. Ethernet connection for other NC's are being developed.
New functions
The latest release of 3DSI brought new functions, among which, the most important are:
- Anti-collision feature to check the measurement path during simulation, taking into account the overall dimensions of the entire probe assembly (stylus + body + transmitter).
- Tool Offset Feedback for tool length and / or radius compensation. Upon machining cycle completion, remaining stock can be evaluated and the tool table updated.
- Work Offset Feedback gives the possibility of setting the part origin (G54, G55, ..., G59) referred to the origin of the CAD model - in automatic mode.